


A dedicated garage protects your robot mower from heavy rain and harsh UV rays, significantly extending its lifespan. In this comprehensive guide, we'll walk you through how to build a DIY robot lawn mower garage with the correct dimensions and share creative design ideas to make your garage a beautiful addition to your garden.
Benefits of a Robot Mower Garage
Whether you want to protect the charging station or enhance your garden's aesthetics, a robot mower garage is a smart investment. The benefits are extensive:
- Protection Against Moisture: A garage keeps the charging port dry and prevents corrosion, ensuring your robot lawn mower remains in peak condition and avoids electrical faults.
- Temperature Regulation: By shielding the device from direct sunlight and high temperatures, it prevents sensitive electronic components and the battery from overheating during charging cycles.
- UV Protection: It blocks harmful UV radiation that can otherwise fade the plastic housing and weaken the material over time, keeping your mower looking new for longer.
- Stable Charging Alignment: Over time, the ground beneath a charging station can become uneven due to rain and the repeated weight of the machine. This often creates height differences that prevent the charging pins from connecting properly. A garage with a stable, level base ensures that both the mower and the station remain perfectly aligned at all times.
Equipping your robot mower with a house is a low-cost, high-return investment that effectively extends the lifespan of your mower.
How to Build a Robot Lawn Mower Garage in 6 Steps
Building a DIY robot mower garage is a rewarding project that allows you to customize a protection solution to fit your garden’s aesthetic and your mower’s specific needs. Here are the 6 essential steps to build your own robot mower garage:
Step 1: Choose The Building Materials
The material you choose directly impacts the durability, look, and complexity of the garage. There are 4 common options for mower garage structures in Europe:
1. Wood
Wood is the classic choice, offering a natural and rustic beauty. It is easy to work with—cutting, drilling, and assembling are straightforward even for beginners.
- Pros: Natural insulation keeps the interior cool; blends perfectly into garden landscapes.
- Cons: Requires pressure-treated lumber and regular staining or painting to prevent rot and mold.
Expert Tip: Periodically check and tighten screws to ensure the structure remains stable over years of outdoor exposure.
2. Metal (Aluminum/Steel)
For those seeking a modern look and maximum robustness, metal (like aluminum or stainless steel) is an excellent choice. It offers superior resistance to rain and rust.
- Pros: Fireproof, waterproof, and extremely durable with a long lifespan.
- Cons: Harder to customize as a DIY project; can heat up quickly in direct sunlight.
Expert Tip: In warmer climates, opt for an open "carport-style" design to allow air circulation and keep the interior cool.
3. Acrylic or Plastic
If you want a lightweight rain cover that is quick and budget-friendly to assemble, acrylic sheets are highly effective.
- Pros: Lightweight, affordable, and easy to install.
- Cons: Provides less shade than wood or metal; can become brittle or fade after long-term UV exposure.
4. Brick and Stone
Constructing a literal "tiny house" using bricks or stones is the most permanent and robust solution for a robot mower garage. It provides exceptional protection against years of sun, rain, frost, and extreme heat while blending seamlessly into classic garden landscapes.
- Pros: Remains stable under any extreme weather conditions; creates a high-end, integrated look with your existing garden masonry.
- Cons: Requires masonry skills and significant physical labor; difficult to move once built.
Expert Tip: If your lawn has a slope, you can use the natural incline to build a semi-underground "hobbit house" or a "miniature castle" for a unique visual impact.
Step 2: Measure Your Robot Mower
Before you start construction, you must know your mower’s dimensions and include a "safety margin." This ensures the garage comfortably houses the machine and the charging station.
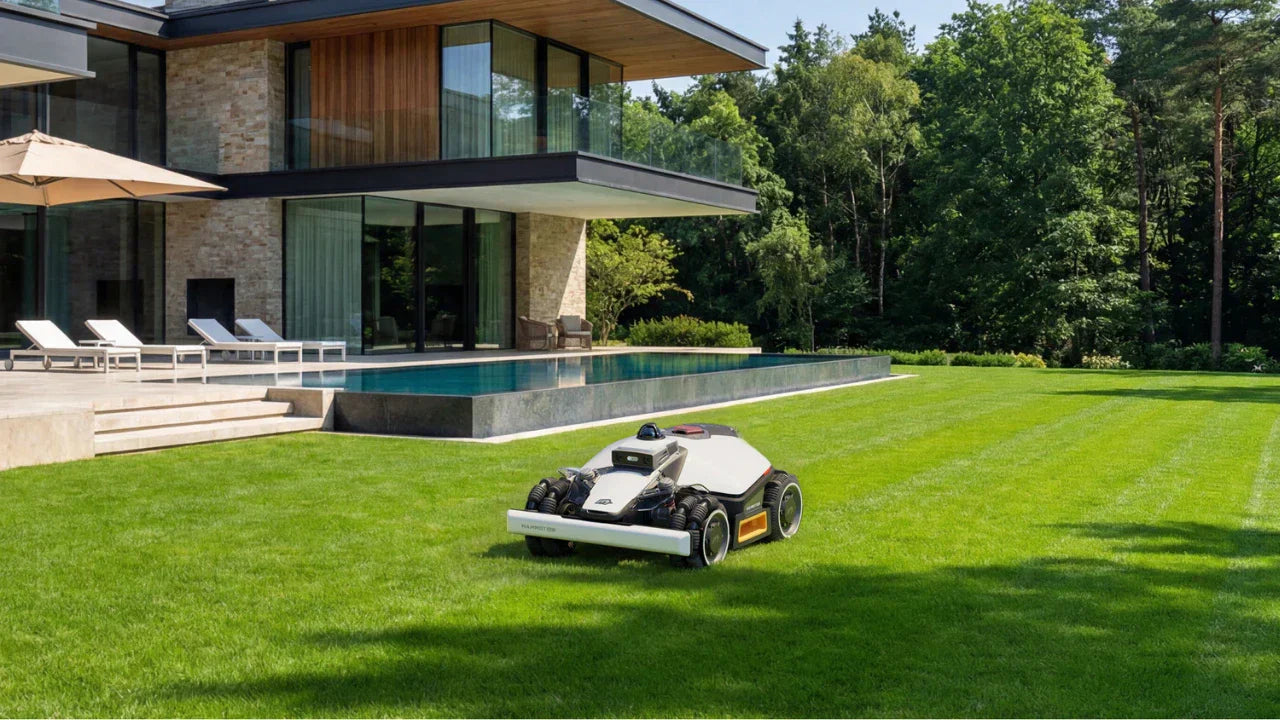
You can find the dimensions on the product packaging, in the manual, or on the manufacturer’s website. For example, for the Mammotion LUBA 3 AWD series, the dimensions are 690 × 533 × 279 mm.
Recommended Clearances:
- Width: Machine width + 20 cm (10 cm on each side) to prevent the robot from bumping into side walls during docking.
- Length: Machine length + charging station length + 10 cm margin to ensure the wheels stay on a level surface.
- Height: The roof must be high enough to allow you to open the display hatch for settings without moving the machine out of the garage.
Note: While you can use online information as a reference, you don't have to strictly follow these figures in your design. You can allocate some extra space in your robot mower garage design based on your specific needs.
Step 3: Create a Design Plan
Before you start cutting materials, sketch a blueprint that includes the length, width, height, and roof pitch. Given the European climate, a sloped roof is highly recommended for efficient water drainage and to prevent snow buildup. Ensure your plan includes pre-designed openings for power cables at the rear. A solid plan keeps the building process organized and significantly reduces material waste.

Step 4: Prepare Your Tools
To achieve a professional finish, you need the right equipment. Regardless of which material you choose to build a mower garage, here is a universal tool list for your project:
- Measuring Tape & Spirit Level: For precise measurements and to ensure the base is perfectly horizontal.
- Power Drill/Driver: For pre-drilling holes and securing the structure with screws.
- Screwdrivers & Wrenches: For fine assembly and tightening components.
- Hand Saw or Circular Saw: Essential for cutting wood, metal, or acrylic sheets to size.
- Sandpaper or Orbital Sander: To smooth down edges and prevent splinters or sharp corners.
- Silicone Sealant: For waterproofing joints and preventing leaks.
- Weatherproof Paint or Varnish: To enhance durability and give your garage a polished look.
- Safety Gear: Work gloves and safety goggles are a must for any DIY project.
Step 5: Assemble Your Robot Mower Garage
With your materials, measurements, blueprint, and tools ready, it’s time for assembly. Here we'll use a wooden garage as an example, follow this step-by-step process:
1. Prepare a Stable Foundation
Never build directly on the grass. We recommend laying flat paving stones, concrete slabs, or a treated wooden base. Use a spirit level repeatedly to ensure the foundation is perfectly horizontal. If the base tilts even slightly, the mower may fail to align with the charging pins during docking, leading to charging errors.
2. Build the Support Frame
Cut the lumber according to your blueprint. Start by assembling the bottom frame, then erect the four corner posts. Use stainless steel or galvanized screws to prevent rust. The frame must be sturdy enough to withstand the weight of winter snow and strong wind gusts.
3. Install Side and Rear Walls
Fix your pre-cut wooden boards to the frame.
- Ventilation: Leave a small gap at the top of the side walls or at the back. Good air circulation prevents moisture buildup inside and helps cool the battery during charging on hot summer days.
- Cable Routing: Drill a hole for the power cable at the back or near the bottom side. This allows the charging station cables to pass through neatly without being pinched against the wall.
4. Install a Waterproof Roof
The roof is the core of the protection.
- Sloped Design: Ensure a pitch of at least 5–10 degrees so rainwater drains quickly.
- Waterproof Layer: Apply roofing felt or shingles over the wooden boards. The edges should overhang the walls slightly to prevent rainwater from running down the siding and into the garage.
5. Anchoring and Final Check
Secure the finished garage firmly to the foundation. Finally, perform a docking test: manually guide the robot into the garage to ensure it doesn’t bump into anything, there is enough clearance to open the control hatch, and the charging light activates correctly.
Step 6: Personalize and Decorate
The final step is to make the garage a beautiful part of your home environment!
- Match the Aesthetics: Paint it the same color as your main house for a cohesive look.
- Green Roof: Plant succulents or sedum on a flat roof; it’s visually stunning and acts as natural thermal insulation.
- Solar Lighting: Install solar-powered LED lights with motion sensors. This makes it easier to check on the mower at night and adds a high-tech ambiance to your garden.
10 Creative Robot Lawn Mower Garage Ideas
While you can purchase ready-made shelters, building your own allows for limitless creativity. Here are 10 inspiring design ideas to kickstart your robot mower garage DIY journey:
1. Manufacturer’s Standard Garage
Most brands offer dedicated covers. Mammotion robot mower standard garage, for instance, features a sleek, professional, and discreet design that integrates perfectly with the robot’s high-tech aesthetic.

2. Modern Metal Minimalism
A metal garage is the perfect match for homes with a contemporary style. Using aluminum or steel ensures maximum durability and a slim profile, shielding your mower from heavy rain and direct sun with a minimalist touch.

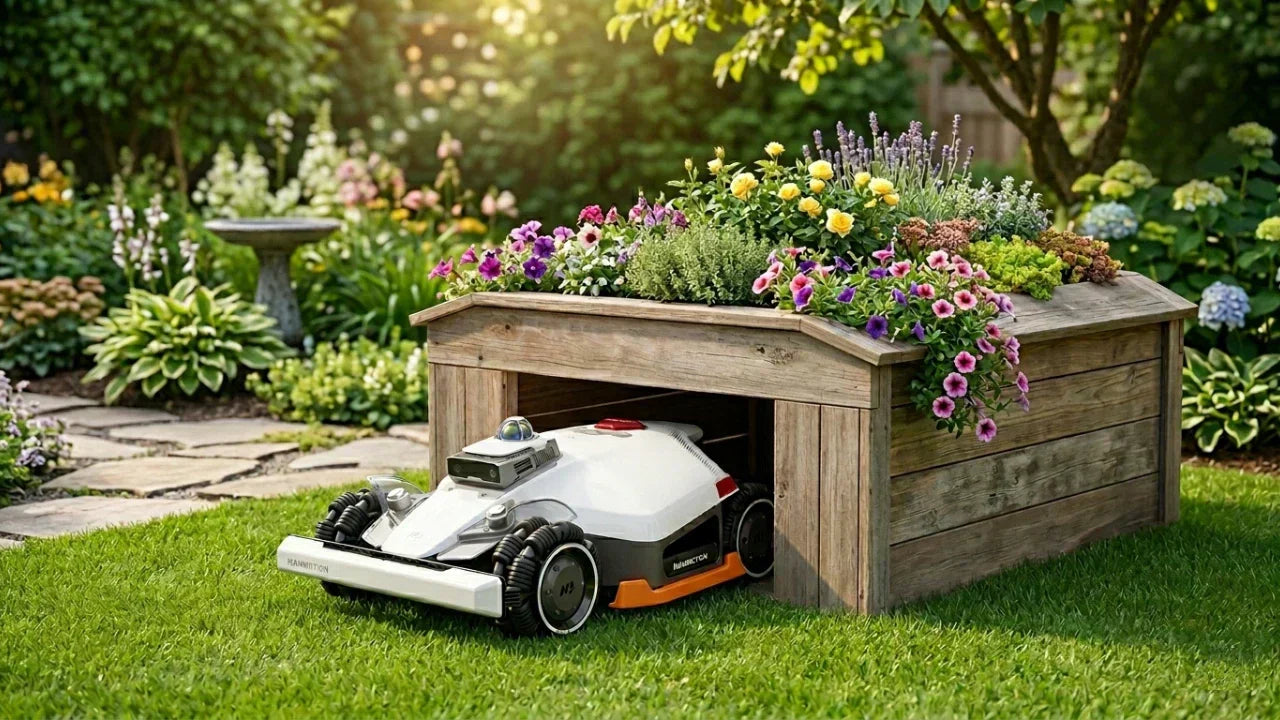
3. The "Planter Box" Garage
One of the most popular designs! By adding a flower box on top of a wooden structure, the garage becomes a living part of your garden. Imagine your mower gliding out from beneath a bed of blooming flowers—it’s both functional and beautiful.

4. The "Grotto" or Cave Hideaway
By stacking natural stones, you can create a cave-like enclosure. This "grotto" style adds immense character and is a good way to "hide" the mower if you prefer a more organic, undisturbed landscape.

5. Built-in Retaining Wall Garage
If your garden has stone retaining walls or raised flower beds, consider building the garage into the wall. Using raw-cut stone blocks creates a seamless, space-saving solution that looks like it was part of the original landscape design.

6. Nordic-Style Cabin
This small wooden cottage design is sturdy and charming. It’s highly effective against harsh European winters and remains an affordable DIY project using readily available online kits or timber.

7. The Miniature Family House
Build a tiny replica of your own home! This is a fun, character-filled project. If you have children, they will love watching the "robot car" go in and out of its own little house—making it a wonderful family DIY activity.

8. Themed or "Cartoon" Enclosures
Let your imagination run wild. From 3D-printed characters to themed paint jobs, a "character" garage adds a sense of playfulness to your backyard.
9. Artisanal Stone Showpiece
Some high-end European designers offer unique stone-cast garages. While these can be expensive, they serve as great inspiration for DIYers looking to use masonry to create a one-of-a-kind garden focal point.

10. Smart Garage with Rolling Shutter
For the ultimate tech enthusiast, a garage with a timed rolling shutter offers professional-grade security. Controlled by a timer or sensor, it protects against theft and extreme weather like hail. But note: This project usually requires some programming knowledge or professional assistance.

Hope these ideas for robotic lawnmower garages can help you with your creations. You can also find more great ideas on social media.
FAQ
Do I need a garage for my robot lawn mower?
While it’s not an absolute requirement, it is highly recommended. Most robot mowers are built for outdoor use, a dedicated garage provides critical protection against extreme weather. It prevents unnecessary wear and tear from heavy rain, hail, and falling debris, ensuring your investment lasts much longer.
Why should I get a robot mower garage?
The main reason is to protect sensitive components. A garage prevents the charging contacts from corroding due to moisture and stops UV rays from fading or weakening the mower’s plastic housing. Additionally, it helps regulate temperatures during charging; if a battery overheats in direct sunlight, its overall lifespan can be significantly shortened.
Can robot lawn mowers be kept outside during winter?
In colder European climates, we generally recommend bringing both the robot mower and the charging station indoors for the winter. Leaving the station outside exposes the electronics to extreme cold and dampness, increasing the risk of circuit failure. If you must leave the station out, it should remain powered on (to generate enough internal heat to protect the circuit board) and be housed under a sturdy, weatherproof garage. However, indoor storage remains the safest option.
Summary
Choosing or building the perfect garage for your robot lawn mower is a helpful way to extend your mower's lifespan while giving your garden a stylish, personal touch. We hope this guide has provided you with the technical tools and the inspiration you need to get started.
Good luck with your build, and we hope you enjoy the process of creating a new home for your robot mower in the garden!


Leave a comment
This site is protected by hCaptcha and the hCaptcha Privacy Policy and Terms of Service apply.